Table of Contents
ToggleFloating shelves have become the go-to storage solution for home offices that need to maximize wall space without the visual clutter of bulky bookcases. They’re sleek, practical, and surprisingly straightforward to install, if you know what you’re doing. Whether someone’s setting up a compact workspace or upgrading an existing office, floating office shelves offer a smart way to keep supplies accessible while maintaining a clean, professional look. This guide walks through everything needed to select, install, and style these space-savers like a pro.
Key Takeaways
- Home office floating shelves maximize wall space without consuming floor area, providing the same storage capacity as traditional furniture while maintaining a clean, professional look.
- Solid wood shelves support 50-75 pounds, metal shelves handle 100+ pounds, while MDF or particleboard work best for lighter loads up to 35 pounds—choose based on your actual equipment and storage needs.
- Proper installation requires locating studs, marking a level line, and securing brackets with 3-inch wood screws into studs to prevent sagging and ensure stability under load.
- A 12-inch shelf depth is ideal for most office supplies and binders, while shelves over 48 inches require center support or thicker material to prevent sagging.
- Style your floating shelves by grouping items in odd numbers, layering heights from back to front, and leaving 30-40% open space to create an organized, intentional look without visual clutter.
Why Floating Shelves Are Perfect for Home Offices
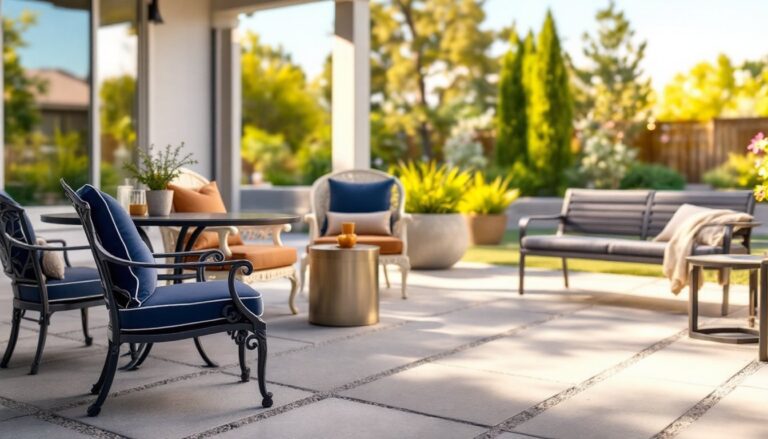
Floating shelves solve one of the biggest challenges in home office design: balancing storage needs with square footage. Traditional furniture eats up floor space, but wall-mounted shelves keep essentials within arm’s reach without crowding the room.
Space efficiency is the obvious win. A standard 48-inch floating shelf takes up zero floor space while providing the same storage capacity as a small filing cabinet. For anyone working with tight dimensions, think converted closets or shared dining room corners, that’s a game-changer.
They also offer visual flexibility. Unlike enclosed cabinets, open shelving lets the user control what’s on display. Reference books, office supplies, and a few tasteful decorative items can create a workspace that feels both functional and finished. Plus, everything’s visible at a glance, which cuts down on the “where did I put that?” moments.
From a practical standpoint, floating shelves are more forgiving than permanent built-ins. Homeowners can adjust shelf height, swap them out, or remove them entirely when priorities change, no patching massive holes or repainting entire walls. That adaptability makes them ideal for renters and homeowners alike who want a custom home office feel without committing to permanent changes.
Choosing the Right Floating Shelves for Your Workspace
Material Options and Their Benefits
The material determines both the shelf’s load capacity and its aesthetic fit. Solid wood (oak, walnut, maple) is the workhorse choice, it handles heavy books and equipment without sagging, ages well, and can be sanded or refinished. Expect to pay more, but the investment shows. A 1.5-inch-thick hardwood shelf can typically support 50-75 pounds when properly anchored into studs.
MDF or particleboard with veneer is the budget-friendly option. It looks decent out of the box and works fine for lighter loads, think paperwork, small printers, or decorative items. Just know that these materials don’t hold up well to moisture or repeated weight stress. Stick to 25-35 pounds max per shelf.
Metal shelves (steel or aluminum) are the heavy-duty champions. Industrial-style brackets with metal planks can handle 100+ pounds and give a modern, utilitarian vibe. They’re particularly smart for home office corner desks where equipment like monitors or multi-function printers needs overhead storage.
Bamboo and reclaimed wood offer eco-conscious alternatives with comparable strength to solid hardwood. They bring character, especially reclaimed barnwood, and often cost less than premium hardwoods. Some homeowners building a green home office prioritize these for sustainability without sacrificing durability.
Size and Weight Capacity Considerations
Shelf depth matters more than most people realize. 8-10 inches works for books, binders, and small decor. 12 inches is the sweet spot for most office needs, it fits standard three-ring binders, small equipment, and boxed supplies without items tipping forward. Go deeper than 14 inches only if storing bulky items like storage bins or larger printers: otherwise, the shelf protrudes awkwardly and eats into clearance space.
Length affects both aesthetics and structural integrity. Shelves over 48 inches generally need a center support bracket or thicker material (minimum 1.5 inches) to prevent sagging under load. Shorter spans, 24-36 inches, are more forgiving and easier to level during installation.
Always check the manufacturer’s weight rating and cross-reference it with actual use. A shelf rated for 50 pounds doesn’t mean piling exactly 50 pounds on it is smart, leave a 20-30% safety margin. For heavy-duty needs, look for brackets or hardware with dedicated weight specs, not just the shelf material rating.
How to Install Floating Shelves in Your Home Office
Tools and Materials Needed:
- Stud finder (electronic model preferred)
- Level (24-inch or laser level)
- Drill with bits (including masonry bit if mounting to concrete)
- Screws (typically 3-inch wood screws for studs, or appropriate wall anchors)
- Pencil
- Tape measure
- Safety glasses
- Optional: painter’s tape for marking
Step 1: Locate the Studs
Use a stud finder to mark stud centers along the wall where the shelf will mount. Standard residential framing places studs 16 inches on center, though older homes might use 24-inch spacing. Mark each stud location with light pencil marks at the desired shelf height. If the shelf span doesn’t align with two studs, plan to use heavy-duty wall anchors rated for drywall, look for toggle bolts or expanding anchors rated for at least 50 pounds each.
Step 2: Mark Shelf Height and Level Line
Measure up from the floor (or desktop if shelving above a desk) and mark the exact height for the shelf’s bottom edge. Use a level to draw a faint horizontal line across the span where the shelf will sit. Double-check this with a 24-inch level or laser level, unlevel shelves are glaringly obvious once loaded.
Step 3: Attach Mounting Brackets or Hardware
Floating shelves typically use one of two systems: concealed brackets (a metal rod or channel that slides into the back of the shelf) or visible L-brackets. For concealed systems, the bracket mounts directly to the wall first. Drill pilot holes into the stud locations, then drive 3-inch wood screws through the bracket into the studs. If using anchors in drywall, follow the anchor manufacturer’s torque recommendations, overtightening can strip the anchor.
For L-brackets, mount each bracket to a stud if possible, ensuring they’re perfectly level with one another. A 48-inch shelf needs at least two brackets: 72-inch shelves should have three.
Step 4: Mount the Shelf
Slide the shelf onto concealed brackets, or set it atop L-brackets and secure from underneath with screws (usually provided). Give the shelf a firm tug to test stability before loading it. If there’s any wobble, recheck that screws are seated in studs, not just drywall.
Safety Note: Always wear safety glasses when drilling overhead. Dust and debris fall directly into eyes during wall penetration. If mounting to masonry or brick, use a masonry bit and appropriate anchors, never assume wood screws will hold.
Permit and Code Considerations: Floating shelves are considered cosmetic and don’t typically require permits. But, if the installation involves opening walls or modifying structural members (rare but possible in custom built-ins), check local building codes. The 2021 International Residential Code (IRC) doesn’t specifically regulate shelf installation, but any structural modification to load-bearing walls requires professional assessment.
Creative Ways to Style Your Home Office Floating Shelves
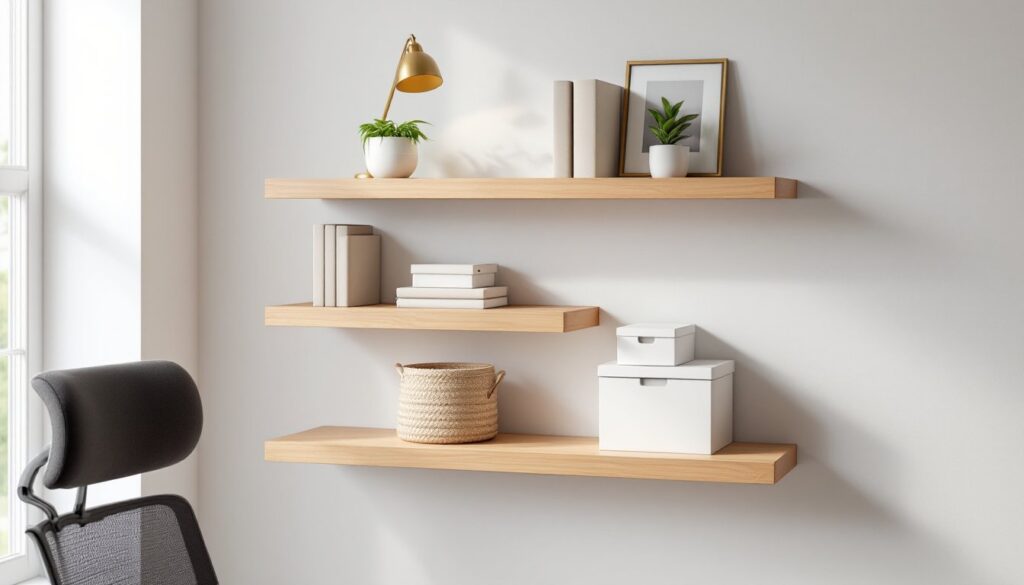
Once installed, styling makes the difference between “functional” and “finished.” Start with a layered approach: place taller items (books, storage boxes) at the back, medium-height objects in the middle, and smaller accents toward the front. This creates depth and prevents the flat, lineup look.
Group items in odd numbers, three matching file boxes, five favorite books, a single plant. It’s a designer trick that feels more organic than symmetrical pairs. Mix textures too: smooth ceramics next to woven baskets, metal desk accessories beside wood frames.
Functional styling ideas:
- Use matching bins or boxes for corralling loose supplies (pens, cables, sticky notes). Label them if the shelf sits above eye level.
- Install small LED strip lights under shelves for task lighting, especially useful for reference materials.
- Dedicate one shelf to “active” items used daily, and another to reference books or archived project binders.
- Position a small Bluetooth speaker or charging station on a lower shelf for easy access.
Decorative styling ideas:
- Add one or two low-maintenance plants (pothos, snake plant) in simple pots. They soften the space without demanding daily attention.
- Lean a small piece of framed art or an inspirational print against the back wall, don’t hang it, just prop it.
- Incorporate a few personal items: a vintage camera, a travel souvenir, or a small sculpture that sparks creativity.
Avoid overcrowding. A common mistake is filling every inch of shelf space. Leave 30-40% open to maintain visual breathing room and make the display feel intentional rather than cluttered. This principle aligns well with home office feng shui concepts that emphasize balance and flow.
For those seeking additional inspiration on arranging office elements, resources like Apartment Therapy showcase countless real-world examples of styled workspace shelving. Similarly, browsing project galleries on Houzz can spark ideas for integrating floating shelves into broader home office wall ideas that unify the entire room.
Conclusion
Floating office shelves deliver serious function without sacrificing style or floor space. By selecting the right materials, installing them securely into studs, and styling with intention, any home office can gain both storage capacity and visual polish. The result? A workspace that’s as organized as it is inspiring, and one that adapts as needs evolve.